Dashboard#
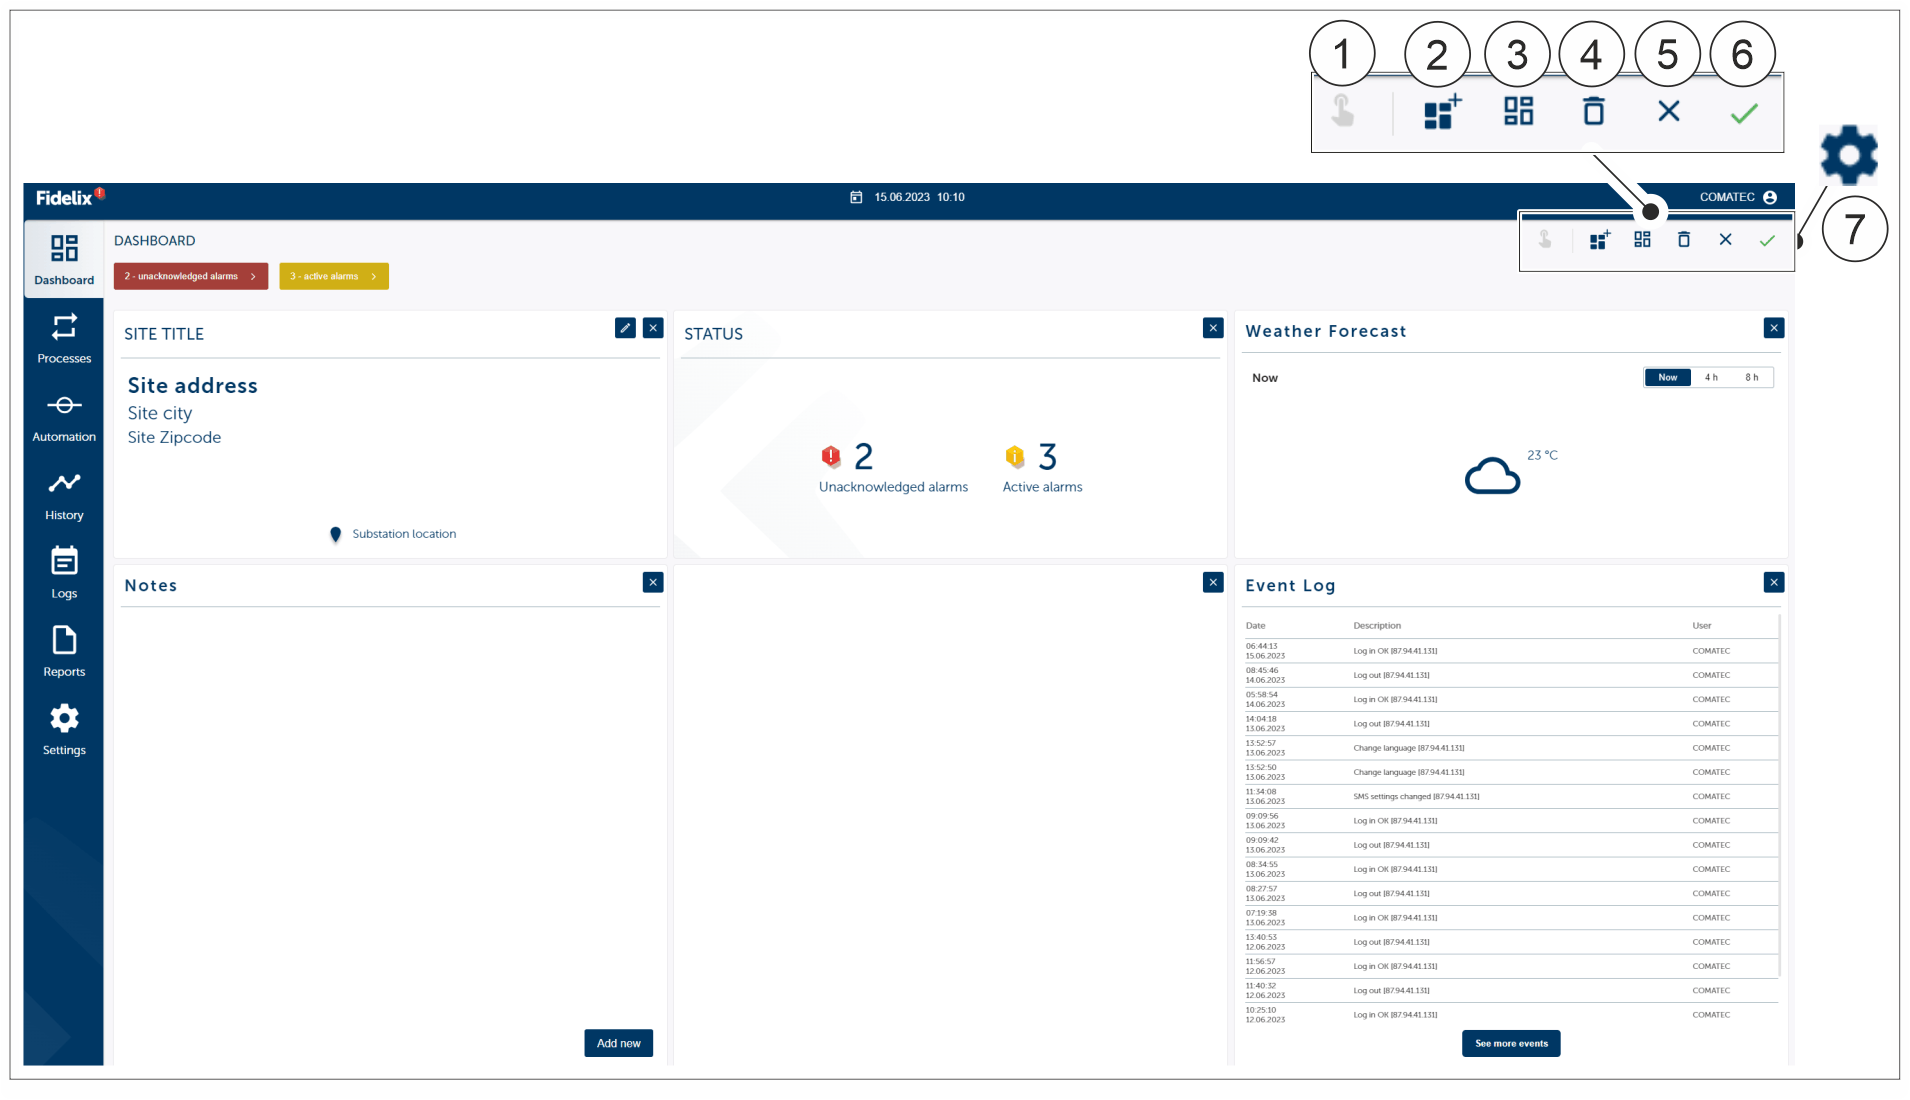
Entering to the dashboard settings#

1 |
Drag and drop |
2 |
Create dashboard card |
3 |
Default dashboard |
4 |
Delete all cards |
5 |
Cancel |
6 |
Save |
7 |
Dashboard settings |
Tap the Dashboard settings (7) button. After tapping the button the list of settings appear on the view.
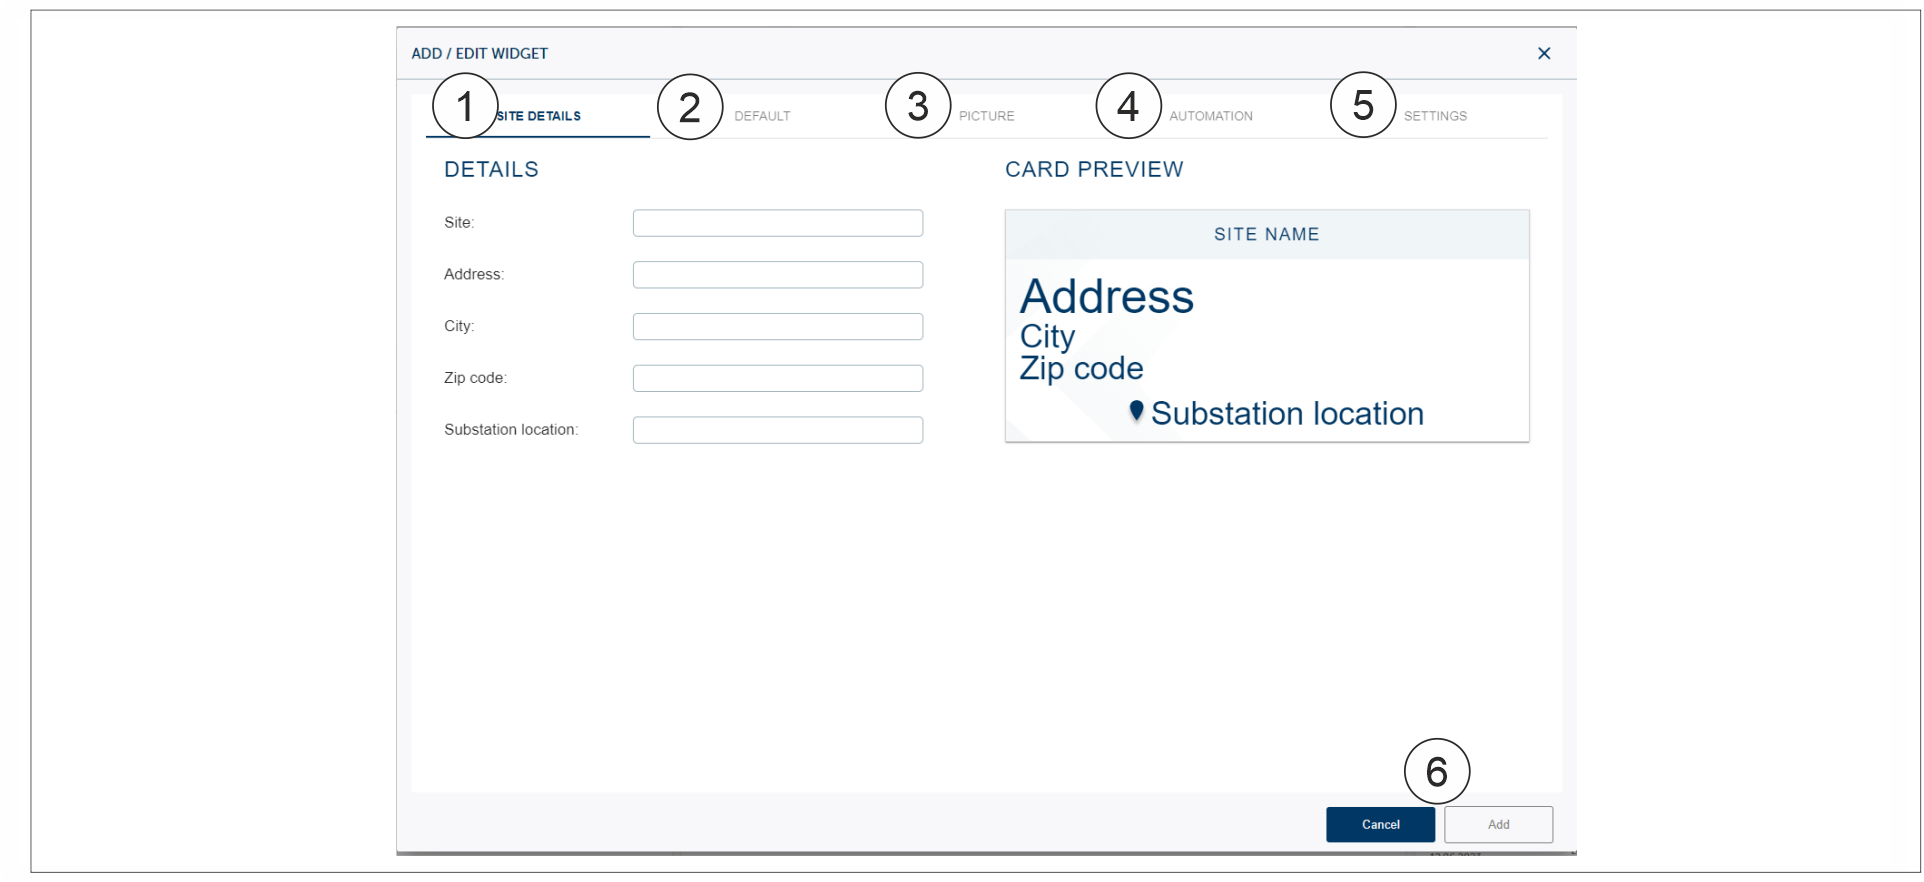
Adding cards to the dashboard#

1 |
Site details. Site location and address. |
2 |
Default. Default cards. |
3 |
Picture. Picture of the chosen process. |
4 |
Automation. Points wich can be choose on the dashboard: Indication, Measurement, DO-points, AO-points, Real time and Trend options. |
5 |
Settings. Settings cards: Device settings, Clock settings, Activations, GSM settings, SYSTEM, Port setting, Network settings, Firewall settings, Information synchronization. |
6 |
Cancel / Add. Cancelling the card or adding the card on the Dashboard. |
Tap the Create dashboard card (2) button and the Add/Edit widget view opens.
Choose the cards and apply them to the Dashboard.
Tap the Save (6) button.
Dragging and dropping cards#
Cards can be drag and drop to the dashboard.
Tap the Drag and drop (1) button and the pop up will show the confirmation text . .. image:: assets/dashboard_2_fidelix_fx_3000.png
Tap the wanted card and drag it to the different place on the view.
Tap Save (6) button.
Note
Tapping the Cancel (5) button will close the active Dashboard settings.
Adding or editing note on the dashboard#

1 |
Add new |
2 |
Note title |
3 |
Note content |
4 |
Cancel |
5 |
Add note |
6 |
Open the note |
7 |
Edit the note |
8 |
Delete the note |
Adding note:
Tap the** Add new** (1) button to add new note.
Tap the Note title (2) field to add the name of the note.
Tap **Note conten**t (3) field to add note content.
Tap Cancel (4) or Add note (5).
Edtiting note:
to open the note: tap Open the note (6) button.
to edit the note: tap Edit the note (7) button
to delete the note: tap Delete the note (8) button